Pages

Wednesday, 31 July 2013

July 2013 | Favorites

Hi there!

I've seen a lot of beauty bloggers and youtubers do these kinds of posts and I absolutely love reading and watching them; so guess what... I'm going to give it a go!

So here are my July Favorites


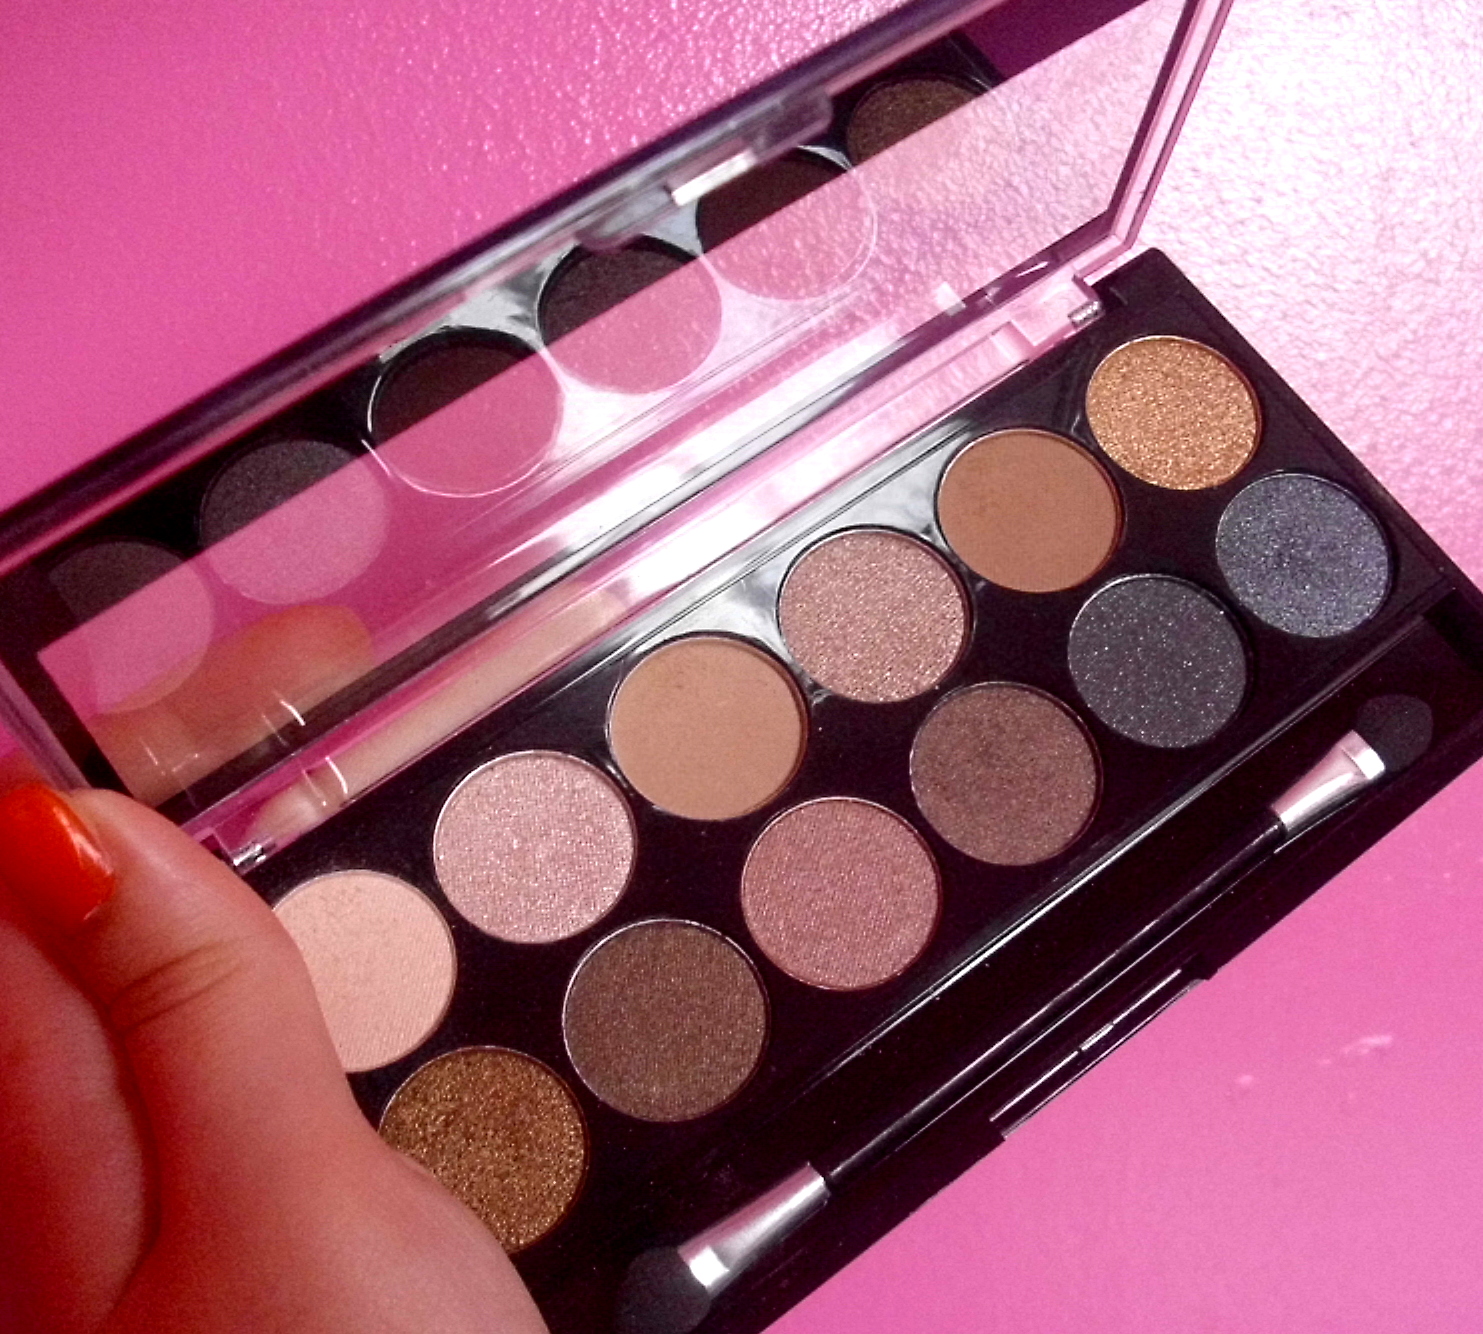
So here's something you might recognise, the MUA Eyeshadow Palette 'UNDRESSED', I did a review which can be found here and also posted some ideas to create which can be found here. I absolutely love this! I'm not usually the type of person to wear a lot of eyeshadows and tend to go for eyeliner instead, however this has certainly changed my mind. The shades here are so summery and each tone blends with any other in the palette so well. 100% a favorite this month!


Here is another that you might recognise, the Barry M Eyeshadow Brush. I bought this at the same time as the MUA palette as I don't own a lot of brushes; but knew if I wanted to create a neat design a brush would be necessary. I have also done a review on this which can be found here. It's high quality and a fantastic price!


Now onto some things that haven't featured in my blog. This Nivea Hydro Care lip balm is absolutely brilliant! I know a lot of people might think that during the winter your lips tend to dry out but I love using this all year round and this month its become one of my favorite products. It puts a smooth protective layer onto your lips which i tend to do at the start of applying any make-up, that way when I apply any lipstick it goes on a treat.


Excuse the fancy editing for this one, as you can probably tell I have pink bedroom walls and the bright orange colour of this nail vanish didn't show up well with it. The summery weather has made me pick this nail vanish a lot more recently and I love it so much. I have a lot of Barry M nail vanishes and this was the first Rimmel one I've tried and believe me it wont be the last. Its such a bright colour, it drys super quick which is a really big bonus seeing as waiting for your nails to dry is so boring (don't you agree?) and it lasts so long! You only need 1 or 2 coats and your nails look summer ready in no time!


Sticking with the summer weather products, fake tan! I know the picture is a little bit, well... not the best, its just the packaging seemed to reflect every bit of light around, sorry about that! Anyway, back to the product, I've used Solait fake tan wipes for a while now, I used to use the spray however that didn't seem to last as long and wipes were just a lot easier. I know this will be a bit hit and miss with people cause some people prefer a natural tan but trust me, this gives you a natural looking tan! It is completely up to you whether you want a light tan finish or want it a bit darker, just apply a bit at a time, wait for the colour to come out and apply more if you feel you want your tan a bit darker. The reason I bought these was because I generally don't really tan that much and of course being out in the sun is unhealthy for you too, so I thought why not try these and I'm glad I did! During July I have absolutely loved them, the sun has come out and so have my summer clothes and a tan tops it all off!


These face masks have been such a regularly used product this month. I'll be honest, I probably don't moisturise and use things like face masks as much as I should but I've been trying to a lot more recently. Superdrug do some really great products and these are definitely some brilliant examples. Both mud masks leave my skin feeling really soft and smooth, I use them at night time before bed and in the morning I wake up with skin so soft and refreshed that I debate whether to even use any make up like foundation or powder. The exfoliating one also has a really lovely smell to it, fruity smells are probably one of my favorite smells so this really does make me love it even more!

So there you have it, my first ever July Favorites! I really hope you've enjoyed this and please tell me what you've enjoyed this month as I would love to have a nose through the comments at your favorite products or maybe some other things that you've loved!

Tuesday, 23 July 2013

Barry M Gelly Nails | Review

Hi there!

I finally did it, I went out and bought myself a Barry M Gelly Nail Paint. I've been wanting one of these for ages and to be honest just never got round to actually buying one. I was out shopping in London yesterday with some friends and went into Topshop and saw the Barry M stand they have and just couldnt resist, so here it it... Barry M Gelly Nail Paint!


I really couldn't decide on the colour as I have a lot of Barry M Nail Vanishes already so wanted something a little different so I got it in the colour 325 Greenberry.


I'll be honest I didn't really expect much difference between the Gelly Nail Paint and just the normal Nail Paint despite the great reviews from everyone but don't worry, I was certainly proved wrong! I love how shiny and glossy the finish is and how easy it is to apply. I was expecting gloopy, sticky paint which took forever to dry but it went on so smoothly and effortlessly! Barry M defintely lived up to the expectations, well... when don't they?

Friday, 19 July 2013

Barry M Eyeshadow Brush | Review

Hi there!

It's review time again and this post is all about the fabulous Barry M Eyeshadow brush!


I'll be honest with you, I don't have a wide variety of brushes for make-up as I tend to not really stick to the make-up rules and use my fingers for foundation and concealer. However after purchasing the MUA Eyeshadow Palette whose review can be found here and ideas for this palette can be found here, I decided that I needed to look into brushes to help create a more professional look and Barry M was the one!


I'll be honest, the reason I picked the Barry M brand was down to the fact that I absolutely LOVE their nail vanishes. Now I know that nail vanishes and brushes will be different within each brand and the quality will vary however I still went with it and I'm glad I did!


Another reason I went with this eyeshadow brush was down to the fantastic price, at only £2.99 it was an absolute bargain!


Overall I am extremely impressed with this brush, I love how soft and smooth the bristles are and how well they blend together power eyeshadow. I would definitely recommend you go for this brush!

Thursday, 18 July 2013

MUA Eyeshadow Palette 'UNDRESSED' | Ideas

Hi there!

So I posted a review of the MUA Eyeshadow Palette 'UNDRESSED' which can be found here and promised that I would then blog again about the looks I created and share some ideas. Well I've had a little practice and after a while of trying different creations I've got together a few ideas that hopefully you'll enjoy! 

These were all created using the MUA Eyeshadow Palette 'UNDRESSED'

01


So this one is a little bit of a smokey but at the same time subtle look (if that's possible?) which I enjoyed wearing as it gave a glow to my eyes. I have shade 2 as a base coat and then blended shade 8 onto the outer half of my eyelid. I then took shade 10 and blended that into the crease area and then into shade 8 too. Finally I highlighted my smokey effect with shade 1. I do also have a small amount of Avon SuperShock Gel Eyeliner which I've previously reviewed and can be found here.

02


This look is much more natural then look 01 and feels and looks really summery. It's a real mixture between a sparkly girly look but also brings in the natural colors to showcase a more festival look? For this I used shade 3 as a base and then shade 9 for the outer half of my eye. I blended this into the base coat a little. I then used shade 10 to add on top of shade 9 slightly (this shade didn't cover half but more of a third) and bought it into the crease line where I again blended. For the tear duct area I added shade 6 gently and then bought it also onto the bottom eye line for the outer third. To finish off I added shade 1 again for a highlighting effect. For this look I am not wearing any eyeliner but just mascara.

03


This is my last look for this post, it has a lovely blue tone to it. I didn't use a base coat for this as I was using darker colours and didn't see the need to clog my eyelids up with eyeshadow when it wasn't going to make much of a difference; so I went straight to shade 11 and covered the outer half of my eye with this. I  then added shade 2 (a lot lighter shade) onto the inner half of my eye and blended this into the outer blue shade. I used shade 8 for the crease area and then smudged this up to the edge of my browbone too, creating the smokey effect. To finish off I once again added shade 1 to highlight.

As you can tell from these three looks you do tend to use the same shades for the same area. For example I used shade 1 for all of the highlighting in every look.

I hope you've enjoyed having a peak at some of the ideas that can be created using just the MUA Eyeshadow Palette 'UNDRESSED' and if you decide to blog on this too then do leave the link in a comment and I'll take a look!

Sunday, 14 July 2013

MUA Eyeshadow Palette 'UNDRESSED' | Review

Hi there!
I'm absolutely loving the weather at the moment and its inspired me to go out and purchase some make-up which was something a little different for me. My daily eye make-up usually consists of having black eyeliner on my top lid, black eyeliner on the bottom and mascara; I've worn this look for pretty much as long as I've been wearing make-up so I thought it was about time to mix it up a bit!
I think heavy eye make-up for myself it a bit too much when the weather is like it is now and the sun is out shining, eye-liner seems to smudge a lot easier and it looks a bit heavy. With that in my mind I went out and purchased a lovely MUA eye palette called 'Undressed', it has 12 subtle shades which really compliment the glowing skin that the sunny weather gives us this time of the year.


The 12 pretty shades include colours which can be used for base coats, crease area work and then also smudged into a smokey effect. There is also a lighter shade which can be used for a highlighting below the brow bone.


 And to top it all off there's even a little Mini Master-Class on how to apply some of the shades to your eyes to create that smudged/smokey look.
I absolutely love how all the shades work well with each other and how they blend well together. And just to make you want to go out and buy yourself one, it is seriously on budget at only £4, amazing!
I've only had this for 2 days now so am still practicing at getting the effect. I've been wearing no eye-liner on my top or bottom lid as the eye-shadow looks so pretty on its own, however a bit of mascara just tops the look off.

I'll be posting some of the looks that I've created using this palette over the next few weeks but if I were you, I'd go out and buy one of these now!

Monday, 1 July 2013

Avon SuperShock Gel Eyeliner | Review

Hi there!
Here's another review for you all and this one is the amazing Avon SuperShock Gel Eyeliner! I've never tried a gel liner before this one so was curious to how it would compare to a felt liner and there's one thing for certain, I will for definite continue to use gel eyeliners, I love them! And if I'm continuing to use gel eyeliners then I will most probably continue to use this one; Avon have some great products and this is for certain one of them!


I preferably don't usually wear my eyeliner this thick and if I choose to wear a winged effect then I would only wear it thinly, however for the purpose of this review I decided to use the gel liner to its full potential!
I absolutely love this product, its so easy to use, it glides along the eyelid smoothly and is extremely long lasting.
Oh and guess what? It's on sale now! So go, go, go!
If you feel like giving it a go then let me know in the comments and maybe leave a link if you have tried it yourself and have also wrote a review.